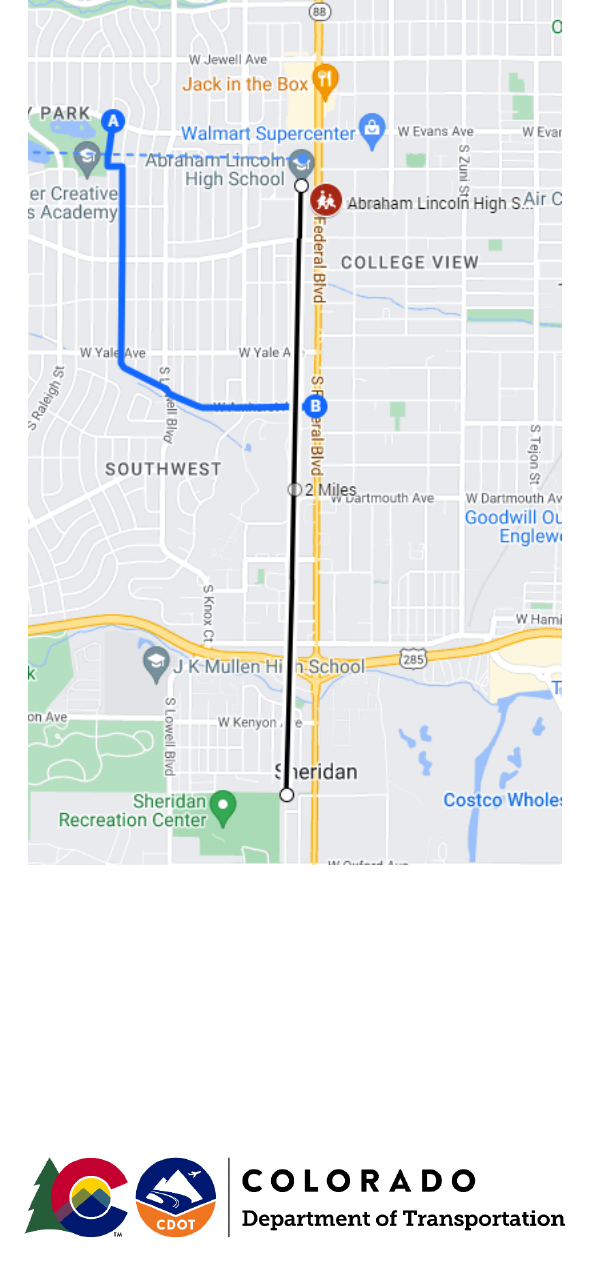
Safe Route to Schools
GOOGLE MAP CREATION INSTRUCTIONS
Nate Rogers | nathanial.rogers@state.co.us | July 2022
PAGE 1
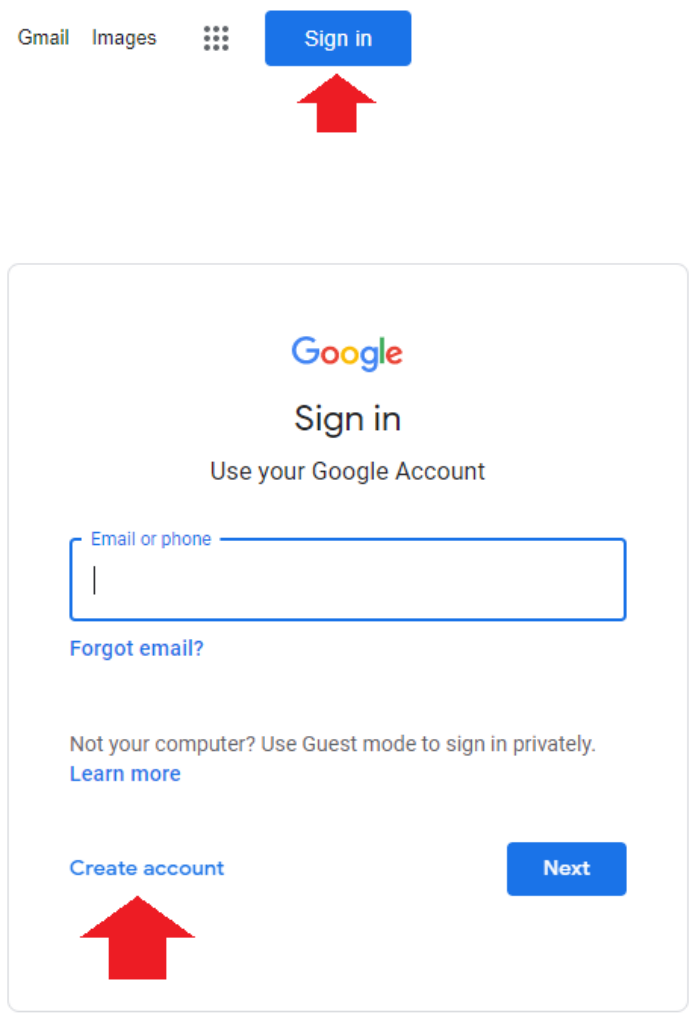
Google Account
A google account is required to access the editing capabilities and map creation within
Google Maps
− Go to google.com and clicking on sign in in the upper right-hand corner
− If you already have a google account, sign in as normal. If you do not, click on
Create Account and complete the steps
PAGE 2
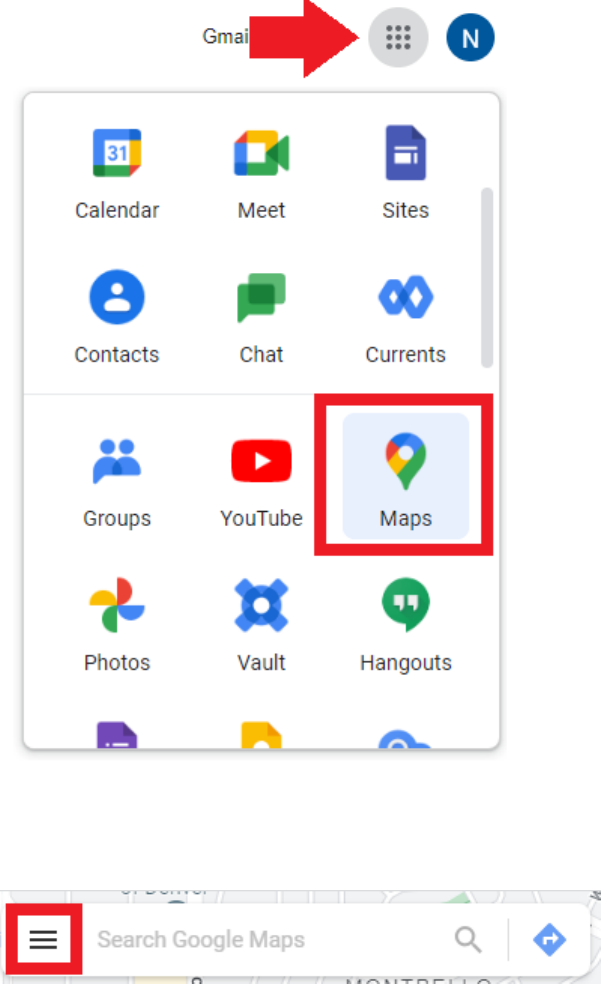
ACCESSING GOOGLE MAPS
− Once signed into your Google Account, click on the 9 dots in the upper right-hand
corner and select Maps
− As Google Maps opens, in the upper left-hand corner of the screen, click on the
three lines
PAGE 3
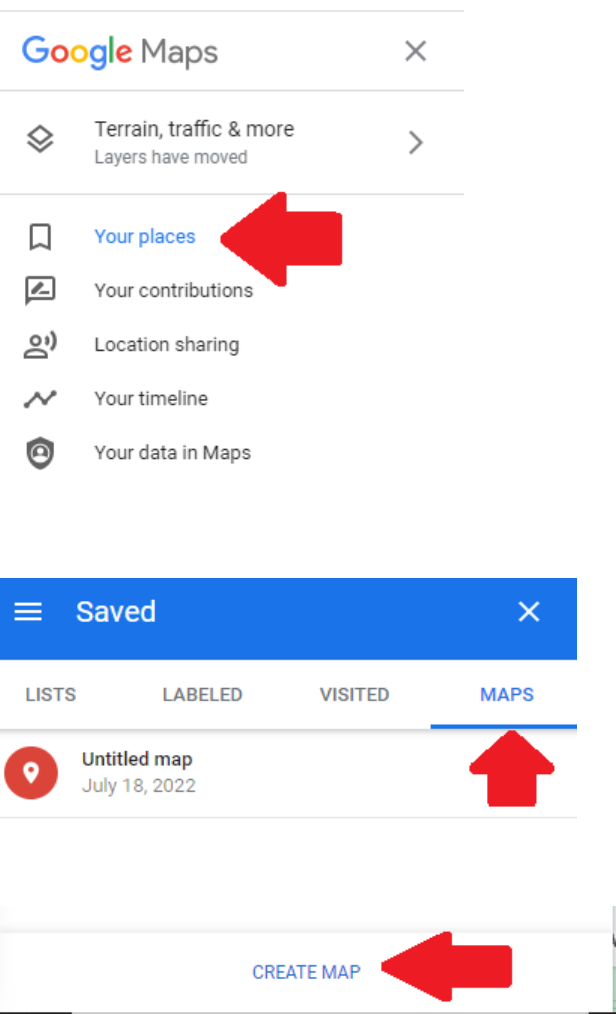
− When the drop down opens, select Your Places
− The select Maps from the top tabs
− At the bottom of the MAPS tab, click on CREATE MAP
PAGE 4
CREATING A MAP
Now that you have entered a blank Google Map, you can start creating your project map
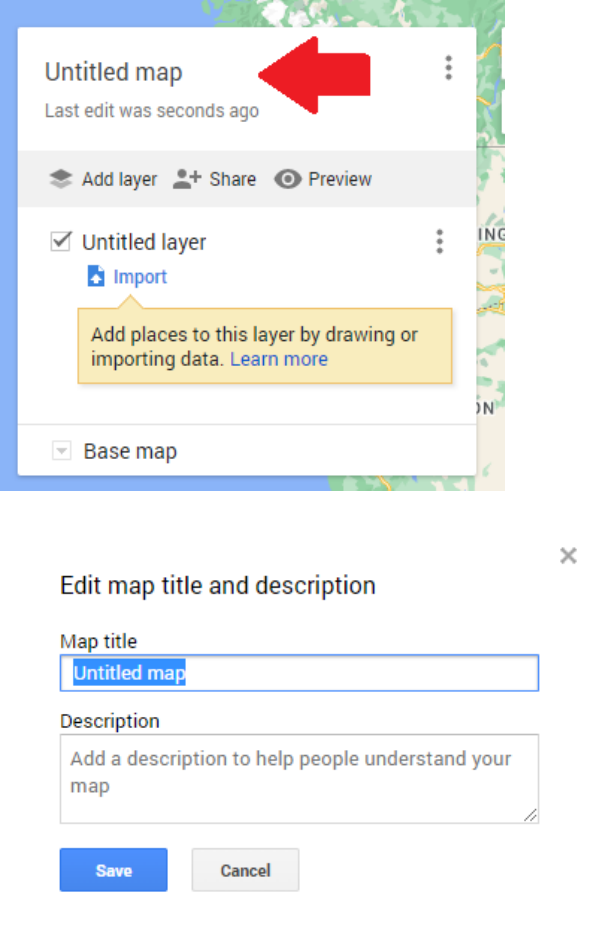
TITLING THE MAP
− Give the project a title, by clicking on Untitled Map in the upper left corner
PAGE 5
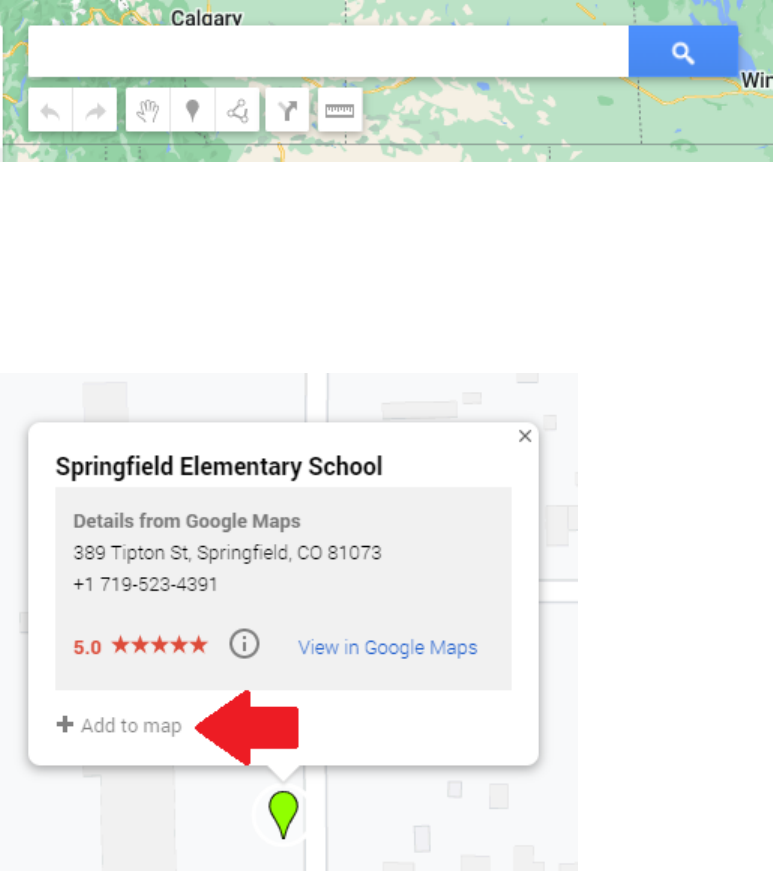
SEARCH BAR
− Use the search bar if the name of the building and/or address is known
CREATING POINTS
− If the search bar is used, you can add that point to the map by clicking + Add to
map

PAGE 6
− In addition, you can add points to the map by clicking on the Add marker button
− After placing your points, you can change the styles and colors by either clicking
on the points individually and clicking on the style button
− Or by clicking on the style button from the layer list
PAGE 7
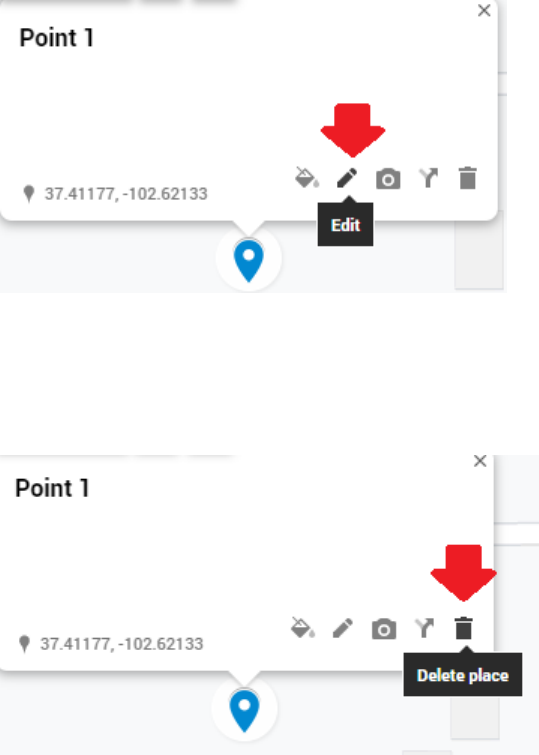
− In addition, you can change the name of the point in the legend by clicking on the
point and clicking on the Edit button
− If you placed the point in the wrong location, you and click on the point, then click
and drag the point to the desired location
− You can delete the point by clicking on the Delete place button
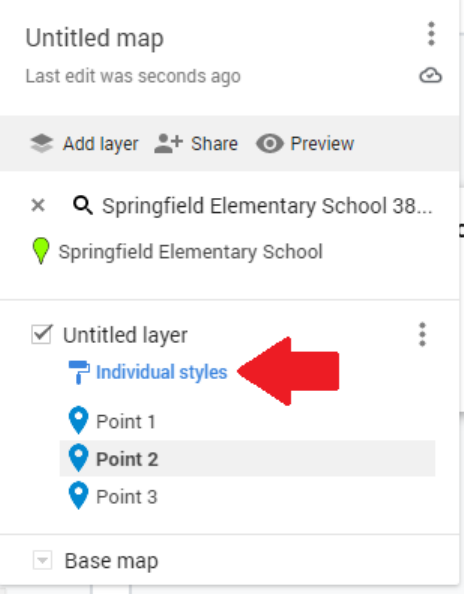
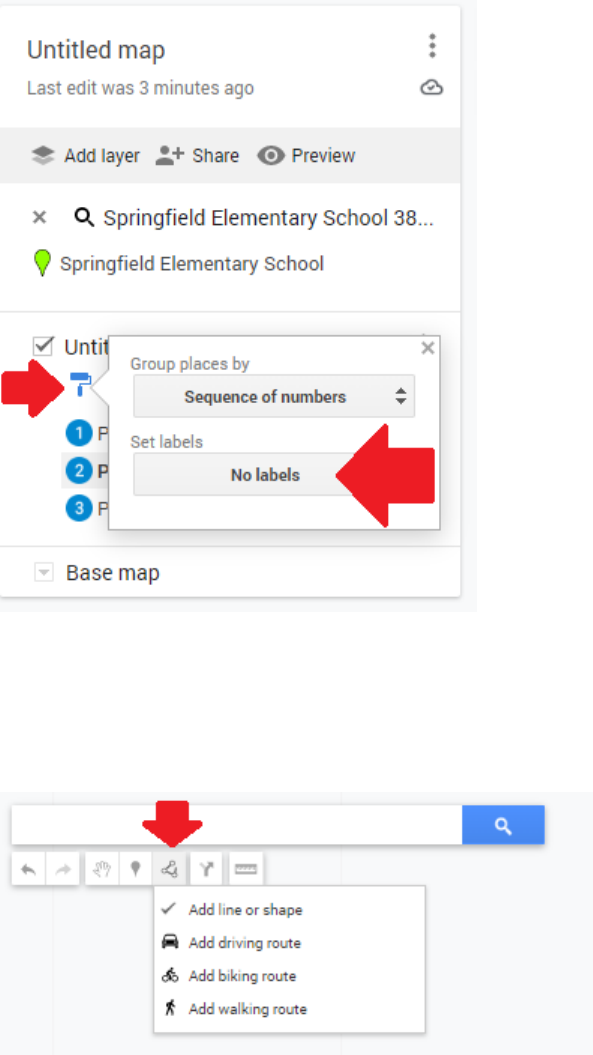
− The points can also be displayed in some other formats by clicking on the styles
option in the layer
PAGE 8
− Style 1: Uniform Style in which all points look the same
− Style 2: Sequence of Numbers in which the points will be numbered in the
order they are placed
− Style 3: Individual Style in which each point can be edited to have its own color
and style theme
PAGE 9
− You can also turn on labels in the same options Styles box in the set labels option
CREATING LINES
− To create lines, click on the Draw a line button
− Add line or shape will allow free hand drawing of lines
− Add driving route will allow you to trace existing road networks found in
Google Maps
PAGE 10
− Add biking route will allow you to trace existing biking networks found in
Google Maps
− Add walking route will allow you to trace existing walking networks found in
Google Maps
− After drawing your desired lines, double click the mouse the end the line
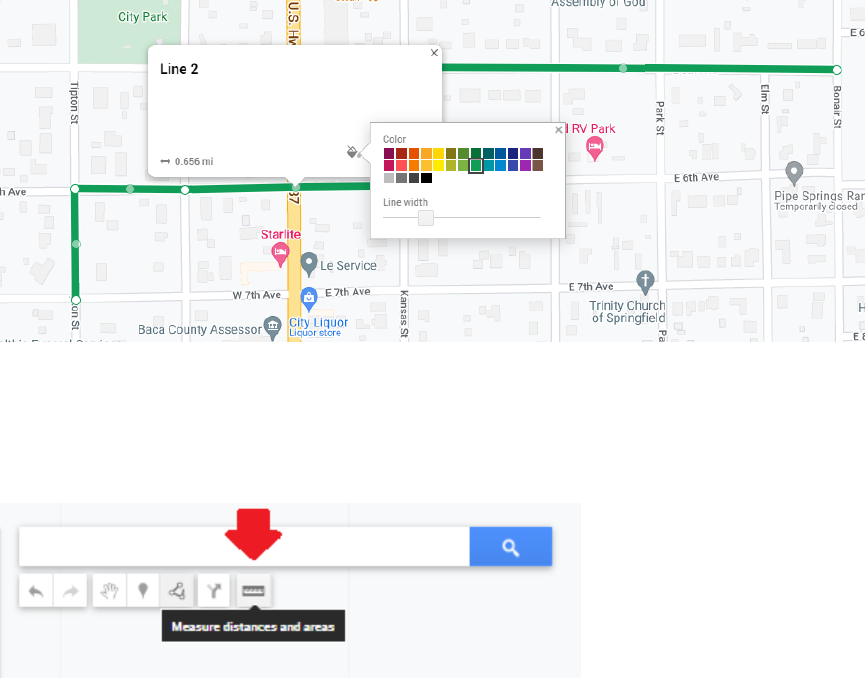
− You can edit the style of the lines by doing the same steps as editing the styles of
points as mentioned above
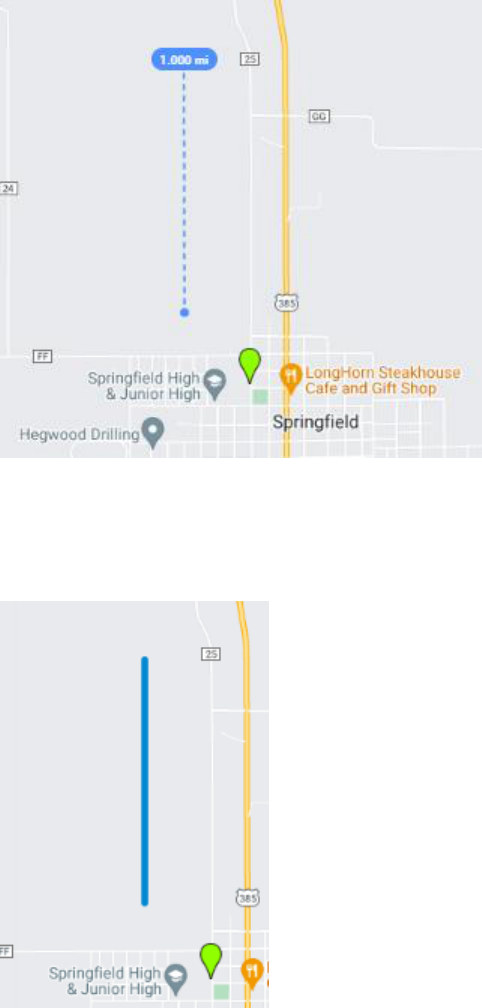
MEASURE TOOL
− To active the measure tool to determine distance, click on the Measure distances
and areas tool
− Click on the starting point on the map and move your mouse in the direction you
wish to go. Once you have gone your desired distance, double click the mouse to
end the measurement
PAGE 11
− Please note that once you click on the map again with the tool, the previous
measure line will be erased so if you wish to keep that line permeant, select the
Draw a line tool as described above and draw on top of the measured line
PAGE 12
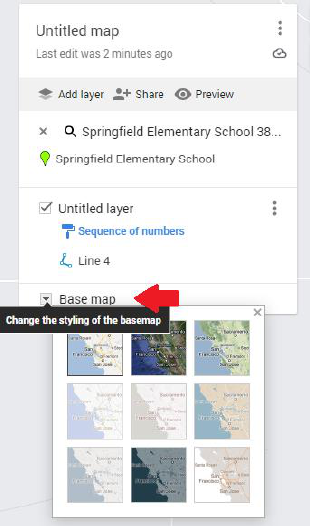
CHANGING BASEMAPS
− To change the background base map, simply click on the Base map drop down
from the layers list and select desired background, such as imagery
PRINTING/DOWNLOADING MAP
− Before you save your map, make sure you have included the following elements:
-1 and 2-mile radii of your project
-Location of the target school, clearly labeled with address
-Major buildings or landmarks
-Major streets/intersections
-Identification of proposed engineering strategies
-Note, you will need to upload the map to your application in PDF format
PAGE 13
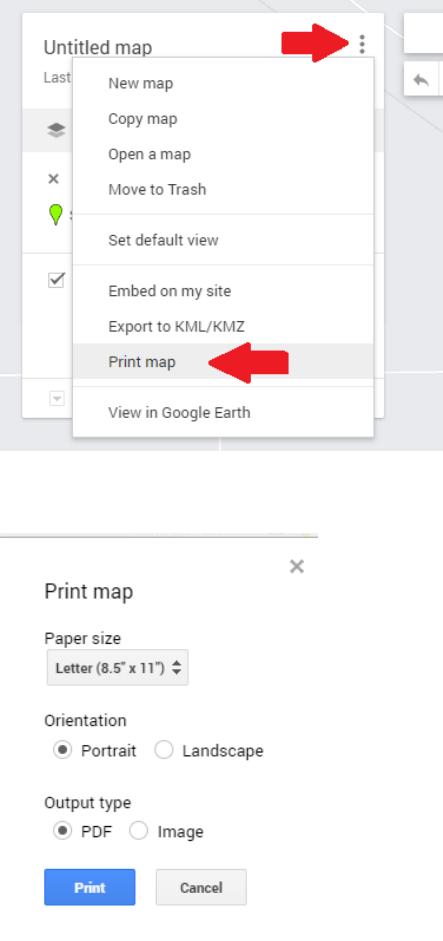
− To print a map, click the 3 dots in the layer list, and select Print map
− Select desired option
− You can now download and save your map as a PDF to your computer, uploading
to your SRTS application where prompted when ready.
SHARING KMLS/KMZS
− If you wish and/or have access to a GIS analyst or programs, you can export the
data into a format which can be brought into Google Earth or other mapping
programs such as ArcGIS

PAGE 14
− To export the data in this format, click on the 3 dots in the layer lust and select
Export to KML/KMZ
REVISITING THE MAP AT LATER DATE
− All the edits are automatically saved, if the map is left for any reason, to revisit it,
just repeat the steps as described above in Accessing Google Maps and you will see
the project name saved under the Maps Tab in your Google Maps Account
